
If you’ve ever tried setting up an eSIM, you’ve likely come across a mysterious term: SM-DP+ Address. It sounds technical, and for many first-time users, it’s the one detail that raises eyebrows during the setup process.
Don’t worry! This guide is written in easy words so you know exactly what it means, why it matters, and how to use it when you activate an eSIM.
At Defy Mobile, we help travelers, business professionals, and everyday users make the most of eSIM technology. So, let’s learn this step by step, clear, simple, and free of jargon.
What Exactly is an SM-DP+ Address?
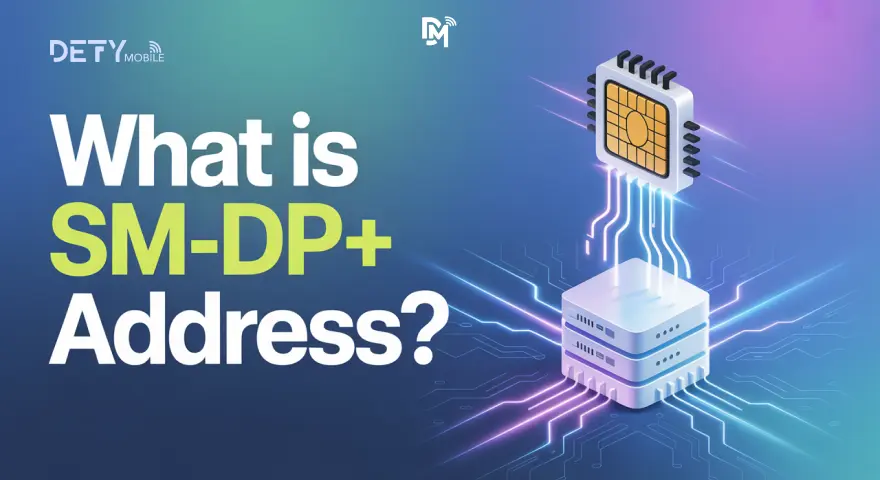
Think of the SM-DP+ Address as the digital “delivery address” where your eSIM details are stored. The full name is Subscription Manager Data Preparation (SM-DP+), which basically stands for subscription manager.
Instead of shipping a physical SIM card, your mobile carrier prepares an eSIM profile and places it on an SM-DP server. When you’re ready to activate, your device fetches the details from this server.
In short, the SM-DP address ensures your phone knows exactly where to look to download your mobile data plan.
For most users, you’ll never have to worry about typing it in yourself. The process happens automatically when you scan a QR code. But in some cases, you may need to enter details manually.
Don't worry, it's a straightforward process, and this guide will walk you through it.
How Does an SM-DP+ Address Work?
Working of the SM-DP Address could be very technical for you to understand. But I can make sure that you understand it in easy language.
Here’s the simple flow:
1. You buy an eSIM plan from a provider like Defy Mobile.
2. The provider generates a unique SM-DP+ Address and an activation code linked to your subscription.
3. Your phone (whether an iOS or Android device) connects to the SM-DP server.
4. It downloads your eSIM profile and installs it in the background.
This is what allows your phone number and mobile network settings to work without a plastic SIM card.
Whether you tap “Add” to add an eSIM on your phone or input the SM-DP address and activation code manually, the result is the same. A smooth eSIM installation that gets you connected to a fast network internet anywhere in the world.
When Do You Need to Enter the SM-DP+ Address Manually?
Most of the time, activating an eSIM is effortless. You scan a QR code, and your phone does the rest. But sometimes, you’ll need to enter the SM-DP+ Address manually along with the activation code.
Here are the most common scenarios:
- QR code doesn’t scan - Lighting, screen glare, or a print error can make a QR unreadable.
- Using certain Android devices - Some phones prompt you to enter the SM-DP address, ensuring a direct connection to the server.
- Switching carriers or countries - When moving your number to a new mobile network, you may be asked to find the SM-DP address and activation code from your provider.
- Tech-savvy users - Some prefer the manual method to double-check that the subscription manager data preparation process works as expected.
The good news? Manual entry is quick. It takes less than a minute, and once you confirm, your phone downloads the eSIM profiles directly from the server.
How to Use the SM-DP+ Address on iOS and Android?
Activating an eSIM with an SM-DP+ Address is straightforward on both iPhone and Android devices. Here’s how:
On iPhone (iOS)
1. Open Settings → Cellular → Add eSIM.
2. Tap “Use QR Code” or choose Enter Detail Manually.
3. Paste or type in the SM-DP+ Address and activation code.
4. Your iPhone connects to the SM-DP server and installs the eSIM profile.
5. Confirm, and your mobile data and phone number will be active.
On Android Devices
1. Open Settings → Connections → SIM Manager → Add eSIM.
2. Tap Add and select Enter SM-DP+ Address manually.
3. Input the SM-DP address and activation code provided by your carrier.
4. The SM-DP server validates your subscription manager details.
5. Your eSIM installation completes, and you’re connected to the network.
Whether iOS or Android, the SM DP address works to ensure your eSIM plan loads securely. Once done, you’re free to travel, browse, and call without ever touching a physical SIM.
Why the SM-DP+ Address Matters for Travelers and Remote Workers?
If you travel often or work remotely, you already know the frustration of juggling SIM cards. The SM-DP+ Address ensures your eSIM installation happens smoothly, so you’re connected the moment you land.
Here’s why it matters:
- Instant connectivity - No hunting for local shops. Your phone pulls the eSIM profiles straight from the SM-DP server.
- Reliable mobile data - The subscription manager keeps your plan updated so you can use maps, ride-hailing apps, and translation tools without worrying about dropped connections.
- One phone, multiple eSIM plans - Perfect if you want a local data line while keeping your main phone number active.
- Seamless work setup - For digital nomads, the SM DP address work guarantees your laptop tethering and calls run without hiccups.
In short, the SM-DP+ Address is the hidden detail that makes global connectivity reliable. Without it, an eSIM plan is just a digital placeholder.
Troubleshooting: What to Do if the SM-DP+ Address Doesn’t Work?
Sometimes, even with the right details, your eSIM won’t activate right away. Don’t panic! There are easy fixes.
1. Double-check the spelling - Even a small typo when you input the SM DP address and activation code can block the connection.
2. Confirm with your carrier - Some providers issue unique activation codes tied to your account. If they don’t match, your mobile network won’t recognize the request.
3. Restart your phone - Simple, but it resets the network handshake.
4. Try Wi-Fi first - Initial subscription manager data preparation requires a stable connection.
5. Re-add the eSIM - Go back to settings, tap Add, and repeat the steps to activate an eSIM.
If nothing works, contact your carrier and ask for a fresh set of details. A quick update to your subscription manager info often solves the issue.
Step-by-Step: How to Enter the SM-DP+ Address on Defy Mobile eSIM?
Defy Mobile makes it simple to activate an eSIM. Here’s the smooth way to get it done:
1. Open your phone’s Settings.
2. Go to Mobile Data (iPhone) or Connections > SIM Manager (on Android devices).
3. Tap Add eSIM or “Add Mobile Plan.”
4. Choose Enter detail manually instead of scanning a QR code.
5. Input the SM DP address and activation code provided by Defy Mobile.
6. Confirm, and wait for the subscription manager to download your profile.
7. Once installed, check your network internet connection and start browsing.
By entering the SM-DP+ Address and ensuring accuracy, you allow your phone to fetch the right eSIM profiles directly from the SM DP server. Within minutes, your eSIM plan is live and your device is ready to roam with high-speed connectivity.
Conclusion
The SM-DP+ Address might sound like technical jargon, but for eSIM users, it’s the key to reliable service. It ensures your eSIM installation is smooth, your mobile network works anywhere, and your data stays active without swapping physical SIMs.
For travelers and professionals, it’s not just a code, it’s peace of mind. With Defy Mobile eSIM, you can add eSIM profiles easily, stay connected globally, and never worry about losing service at the wrong time.
FAQs
What does SM-DP+ stand for?
It stands for Subscription Manager Data Preparation. It’s the server that delivers your eSIM details.
Do I always need the SM-DP+ Address to activate an eSIM?
Yes. Without it, your phone cannot download the correct eSIM profiles.
Where can I find the SM-DP+ Address and activation code?
Your carrier, like Defy Mobile, provides it. Some phones also auto-fill when you tap Add eSIM.
Can I use the same SM-DP+ Address across devices?
No. Each device and eSIM plan may have unique details tied to your account.
What if my SM-DP+ Address doesn’t work?
Check spelling, restart your device, and ensure you’re connected to Wi-Fi. If issues continue, request new details from your provider.